Can An Apple Watch Track Mountain Biking Rides? We Tested One

Are you an avid mountain biker who loves tracking your rides and monitoring your progress?
Have you ever wondered if an Apple Watch can keep up with your adventurous lifestyle?
Well, you’re in luck because we put it to the test!
Yes, the Apple Watch can track a mountain biking ride effectively. With its advanced features and capabilities, the Apple Watch is a reliable companion for outdoor cycling enthusiasts. With built-in GPS and altimeter, it accurately records speed, distance, and elevation, providing precise data to measure your performance and progress.
Below, we’ll explore the capabilities of the Apple Watch when it comes to tracking mountain biking rides.
From GPS accuracy to heart rate monitoring, we’ll dive into the features and performance of the Apple Watch and determine whether it’s a reliable companion for your next mountain biking adventure.
Benefits of Tracking Mountain Biking with an Apple Watch
From monitoring heart rate and calories burned to mapping out routes and analyzing performance, tracking mountain biking with an Apple Watch is a game-changer for cyclists seeking to push their limits and achieve their fitness goals.
Here are some features from Apple Watch for tracking your mountain biking ride:
Automatic Cycling Detection
As a forgetful cyclist, I absolutely love the automatic cycling detection feature on the Apple Watch. It’s a game-changer for me!
Now I never have to worry about remembering to start tracking my mountain biking sessions because my trusty Apple Watch does it for me. It’s like having a personal assistant on my wrist.
It also prompts me to record my ride after a few minutes. This means I never miss out on tracking my rides and capturing all the important data.

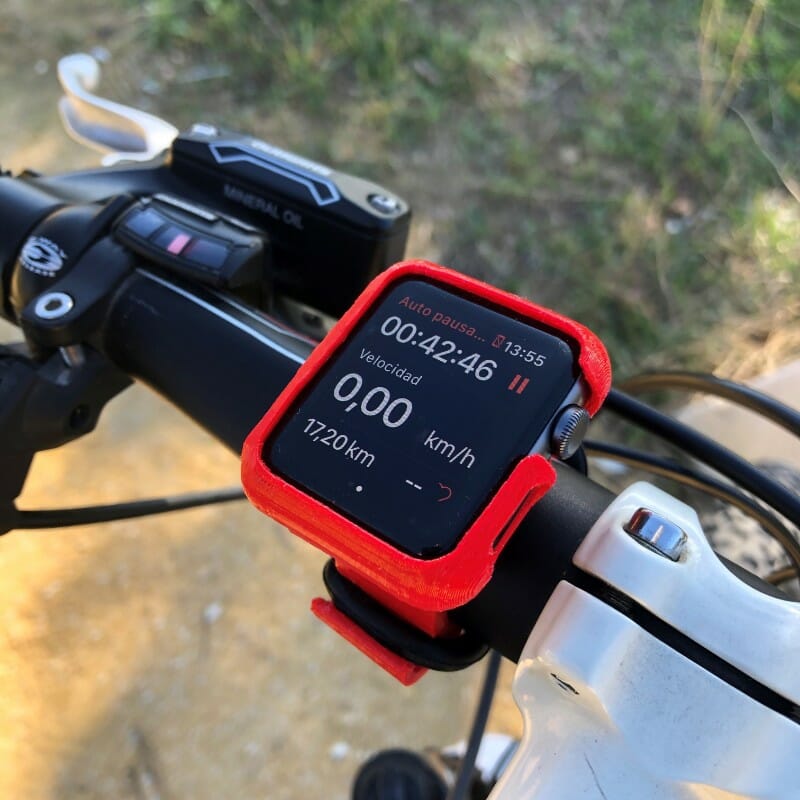
Auto Pause and Resume
The auto pause and resume feature ensures that my workout times aren’t affected by stops during a mountain biking ride. This convenient feature can be easily enabled in Settings or through the companion app on my iPhone.
With auto pause and resume activated, my Apple Watch is like a mind reader. It automatically detects when I take a break during my bike ride and pauses the tracking.
This means I can relax and not worry about manually pausing or restarting the tracking if I need to catch my breath or deal with any interruptions. The watch is so smart that it recognizes when I start biking again and resumes tracking seamlessly.
This feature gives me a clear understanding of my actual active time during the ride without the hassle of manually adjusting my recorded workout durations.
Average Speed
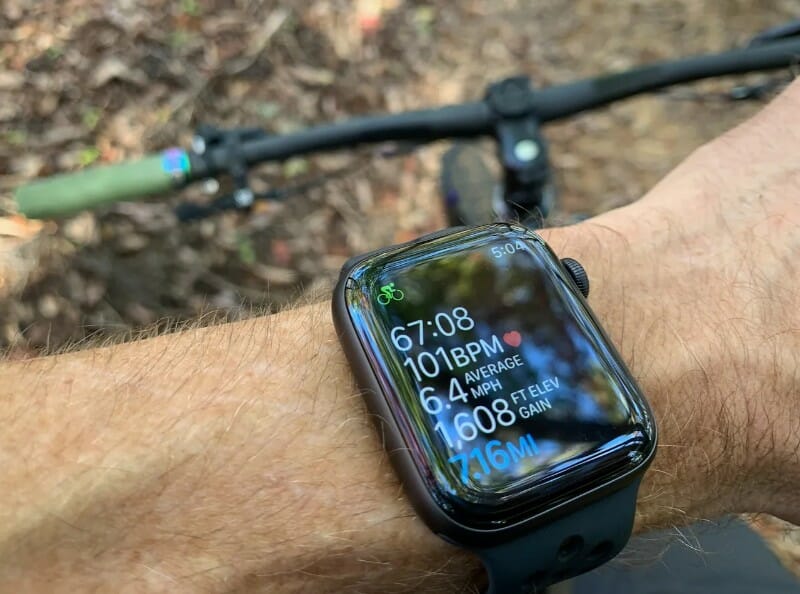
To track average speed during mountain biking using an Apple Watch, you can utilize the built-in biking features or third-party biking apps.
Here’s how the Apple Watch tracks average speed:
Connect to Your Power Meter
Connecting your watch to a bicycle power meter allows you to track power output during cycling workouts.
Here are several ways to connect an Apple Watch to a bicycle power meter:
It’s important to explore your chosen app’s features and settings to ensure it’s compatible with mountain biking and meets your needs for connecting to a power meter.
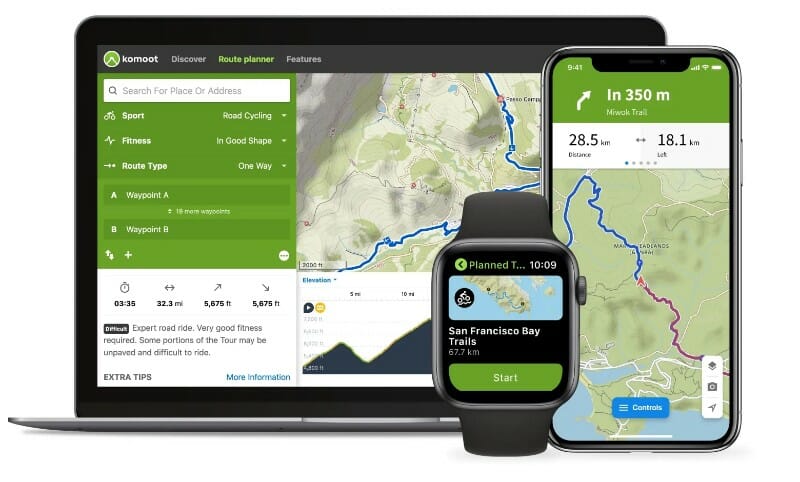
Route Tracking & Mapping
The Apple Watch can track mountain biking routes and provide mapping features using third-party apps.
Here are some of the apps that can be used for this purpose:
Crash Sensor & Emergency Services Can Save Your Life
The crash sensor feature on the Apple Watch is a valuable tool for mountain bikers, providing an extra layer of safety during dangerous and challenging rides.
This feature is designed to detect when a crash occurs and automatically initiate an emergency contact notification.

I have personally tested it for cycling, including mountain biking, and it works great, alerting me when I crash my bike.
Here’s how the crash sensor works:
Setting up the fall detection (3):
Using Emergency SOS:
It’s important to note that Emergency SOS may not work in all regions or situations.
Adding Emergency Contacts:

Heart Rate Zones
Heart rate zones are a valuable metric for monitoring effort levels and finding sustainable intensity during exercise. With an Apple Watch, you can easily track and analyze your heart rate zones while mountain biking.

To view heart rate zones during a mountain biking workout on an Apple Watch, you can follow these steps:
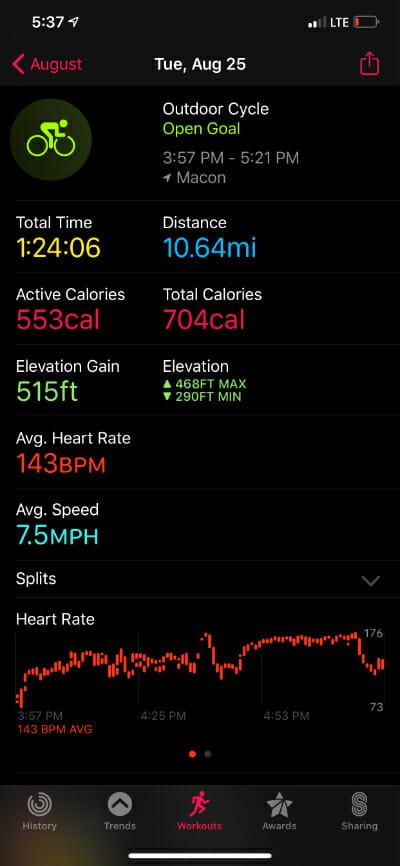
Calorie Burn Monitoring
Based on our experience using the Apple Watch, the accuracy of calorie burn tracking during mountain biking can vary.
We noticed differences in calorie burn tracking compared to other activities like walking.
This could be because the watch prioritizes speed over heart rate, leading to potential inaccuracies.
However, there are third-party apps like Cyclemeter that specialize in tracking cycling activities, including mountain biking.
These apps offer customizable stats, maps, and graphs, making them a great alternative to the native Workout app.
It’s important to remember that calorie burn tracking depends on individual factors such as weight, fitness level, and intensity of the activity.
While the Apple Watch’s estimates may not be 100% accurate for everyone, consistently tracking your rides can still provide valuable data for monitoring your overall fitness and progress over time.
Splits, Elevation, and Rings during a workout
During a mountain biking workout, the Apple Watch provides three important screens: Splits, Elevation, and Rings.
These screens serve different functions and offer valuable information to enhance your biking experience.

The Splits screen gives you a clear view of your pace or speed for each mile or kilometer of your workout. You can see your distance covered, average pace, and time for each split, helping you monitor your performance during each segment of your ride.
The Elevation screen provides valuable information about the changes in altitude during your ride, showing the ascent and descent details. You can view elevation data by swiping up on the workout display to access additional metrics.
The Rings screen shows your progress toward your daily activity goals. It offers a comprehensive overview of your session, displaying your heart rate zones, workout duration, active calorie burn, and more.
You can also customize the metrics displayed during your workout depending on the type of workout.
Here are the steps:
- Open the Workout app: Open the Workout app on your Apple Watch.
- Select the desired activity: Scroll down and select the desired activity, such as cycling.
- Access the Workout Views: Tap the “More” button next to the workout that you want to do.
- Edit the Workout Views: Scroll down and tap “Workout Views”, then tap “Edit Views”.
- Include or remove metrics: Tap “Include” to add a metric to your Workout View or tap the “-” button to remove a metric. You can also tap the “Edit” button next to a metric to edit it.
- Reorder metrics: To change the order of the metrics, tap “Reorder”, then touch and hold the “Change Order” button to change the order.
- Save changes: Tap “Done” to save your changes.
Pacer and Custom Cycling Workouts
Other handy features designed for mountain bikers are Pacer and custom cycling workouts.

To access these features, open the Workout app on your Apple Watch and select the cycling workout option. From there, you can tap the three-dot icon in the top right corner of a cycling workout to access more options, including Pacer and custom workouts.
Which Apple Watch Models Should I Use for Mountain Biking?
There are several models of the Apple Watch that can be used for mountain biking.
Here are some of my recommendations:
Apple Watch Series 7
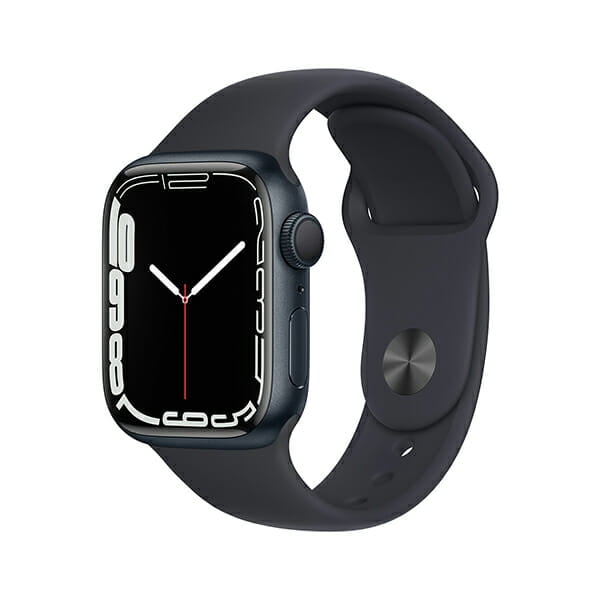
The Apple Watch Series 7 is the latest model and can track mountain biking activities using the native Workout app or third-party biking apps.
Apple Watch Ultra
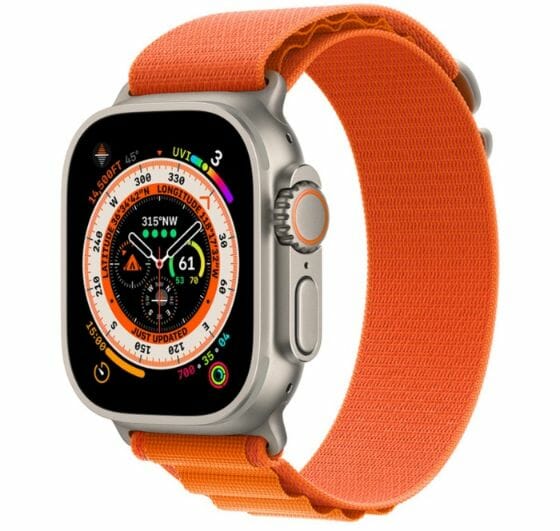
The Apple Watch Ultra is a more rugged version of the standard series and promises features to get mountain bikers stoked. It is not a separate model, but rather a version of the standard series that is more durable.
Apple Watch SE

For those on a budget, the Apple Watch SE offers many of the same cycling features as the Series 7 at a more affordable price point.
It includes GPS tracking, heart rate monitoring, and the ability to create custom biking workouts.
While it may not have all the bells and whistles of the latest model, the Apple Watch SE still delivers reliable performance for mountain biking enthusiasts.
Should I use Apple Watch or Garmin?
The Garmin Fenix and Forerunner series are the Apple Watch’s esteemed competitors for mountain biking.
This is due to the fact that it sports many sophisticated features including topographical maps that allow bike-riding enthusiasts to track data and metrics, making it easy to monitor their progress and performance.
The Garmin also comes equipped with a range of useful functions specifically designed for outdoor activities, something which the Apple Watch struggles to match in terms of usability.
On the other hand, one key disadvantage held by the Apple Watch over its rival is its far shorter battery life.
For those wanting an extended ride or even a multi-day mountain biking expedition, the basic Apple Watch will almost certainly not be able to last you multiple days without charging.
Whether one chooses a Garmin watch or an Apple Watch for biking ultimately comes down to personal preference as both have their own unique set of attributes and drawbacks that need to be considered in order for riders to find their ideal watch.
My Verdict
While an Apple Watch may not be specifically designed for mountain biking, it can still track and monitor your rides with impressive accuracy.
But more importantly, the crash detection and emergency services features may save your life.
So, whether you’re shredding down steep trails or conquering challenging terrain, rest assured that your Apple Watch will be there to keep up with your adventurous spirit.